Zoom-Enabled Classroom
Using a Zoom-Enabled Classroom
This guide is specifically for the University of Massachusetts School of Law Room LL015/LL016.
What Makes Zoom Classrooms Different
Unlike conference-style Zoom Rooms, Zoom-enabled classrooms are designed for teaching and learning. They feature:
- Dual Digital Displays: both displays mirror shared content
- Multiple Cameras: one facing the instructor and another capturing the classroom audience
- Integrated in-room microphones and speakers for clear interaction with remote participants
- Classroom Crestron Touch Panel for selecting inputs/outputs and managing displays
Using Zoom Classrooms on Campus
- Schedule your meeting in advance using your usual method via your UMassD account – Outlook calendar integration, Canvas integration, UMassD Zoom website, etc.
- Bring a laptop with you to share content, manage breakout rooms, and facilitate participant interactions. Use the Zoom Room tablet/control panel to join the already scheduled Zoom meeting.
- Use the room’s built-in equipment for meeting audio. Require in-room participants joining via laptop/tablet to select Leave Computer Audio to prevent feedback
- If others are helping you run the meeting, list their UMassD email as Alternative Hosts on the scheduling form. (Note: use their non-alias UMassD email address.) This way, if they join from a laptop or other device, they will be given the Host/Co-host role as necessary.
Zoom Classroom Home Screen
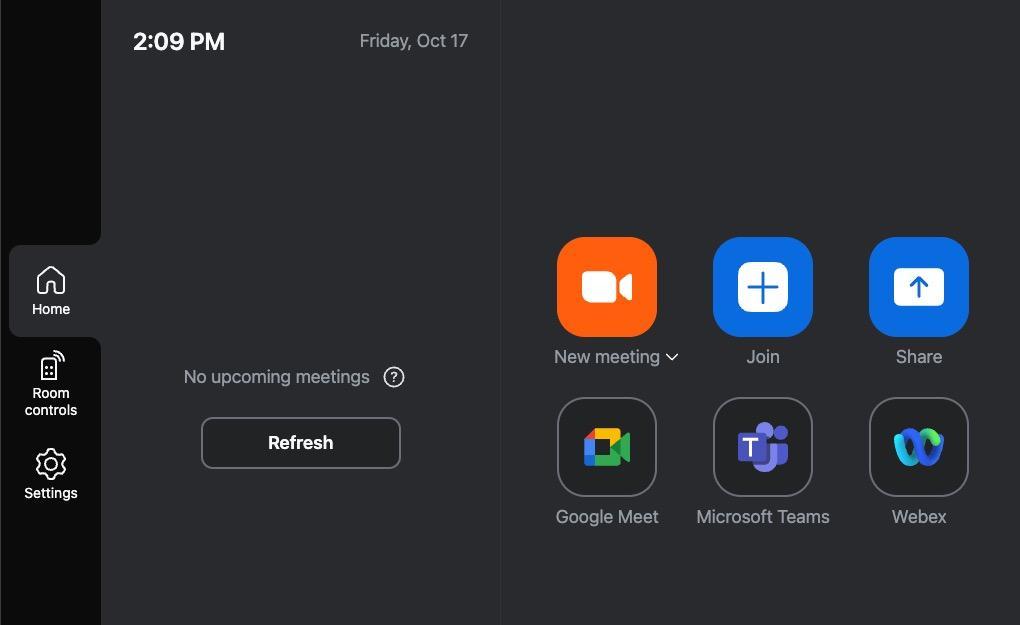
Classroom-Specific Features
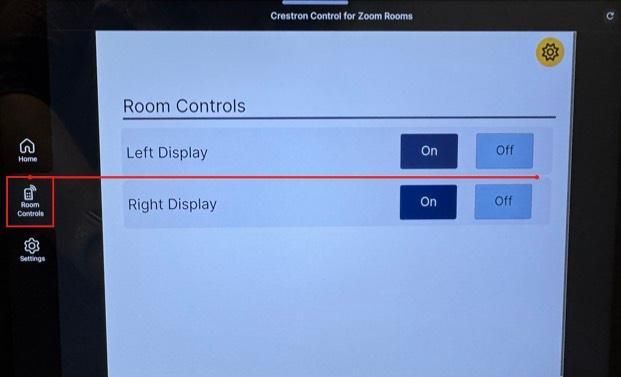
Zoom Room Control (Display Power)
On the classroom touch panel, you’ll see a Room Control button. This lets you power each digital display on or off independently:
- Left Display On/Off – controls the screen mounted on the left side of the room.
- Right Display On/Off – controls the screen mounted on the right side of the room.
- Both displays are normally kept on during class for maximum visibility.
Dual Display Setup in Classrooms
- By default, both digital displays show the shared content (e.g., slides, documents, videos)
- This setup ensures all in-room participants can see your material clearly, no matter where they are seated
- If you prefer to keep an eye on remote participants, you can change one screen to show the Zoom gallery view
- Use the Zoom “View” options on your laptop to enable Dual Monitor mode
- Or adjust the display configuration through the touch panel
Camera Options
- Instructor Camera: Focuses on the front of the room/podium
- Audience Camera: Allows remote participants to see and hear the in-room discussion
- You can switch camera views using the touch panel or Zoom toolbar
Sharing Content
- Always use your laptop's Zoom app to share slides, apps, or web pages
- Screen sharing displays automatically on the dual displays
- Pro tip: Share Window instead of Screen if you want to keep notes private
Managing Interaction
- Use the Participants and Chat panels on your laptop for class management.
- Assign a co-host if you need help monitoring online engagement.
Troubleshooting in the Classroom
- Audio feedback? Remind participants not to connect personal device audio.
- Wrong display output? Use the touch panel to reassign "Gallery" vs. "Content" screens.
- Camera not switching? Re-select the classroom camera in Zoom’s video settings.